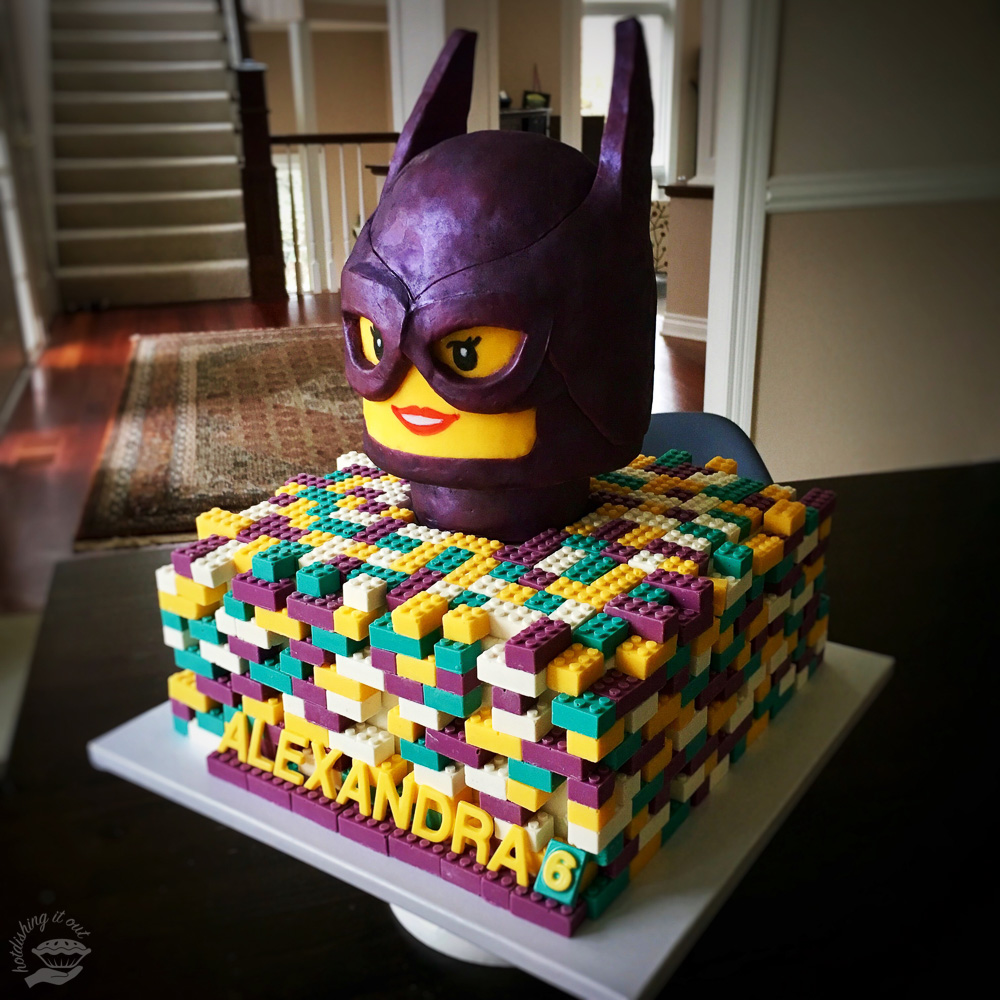
lego batgirl cake

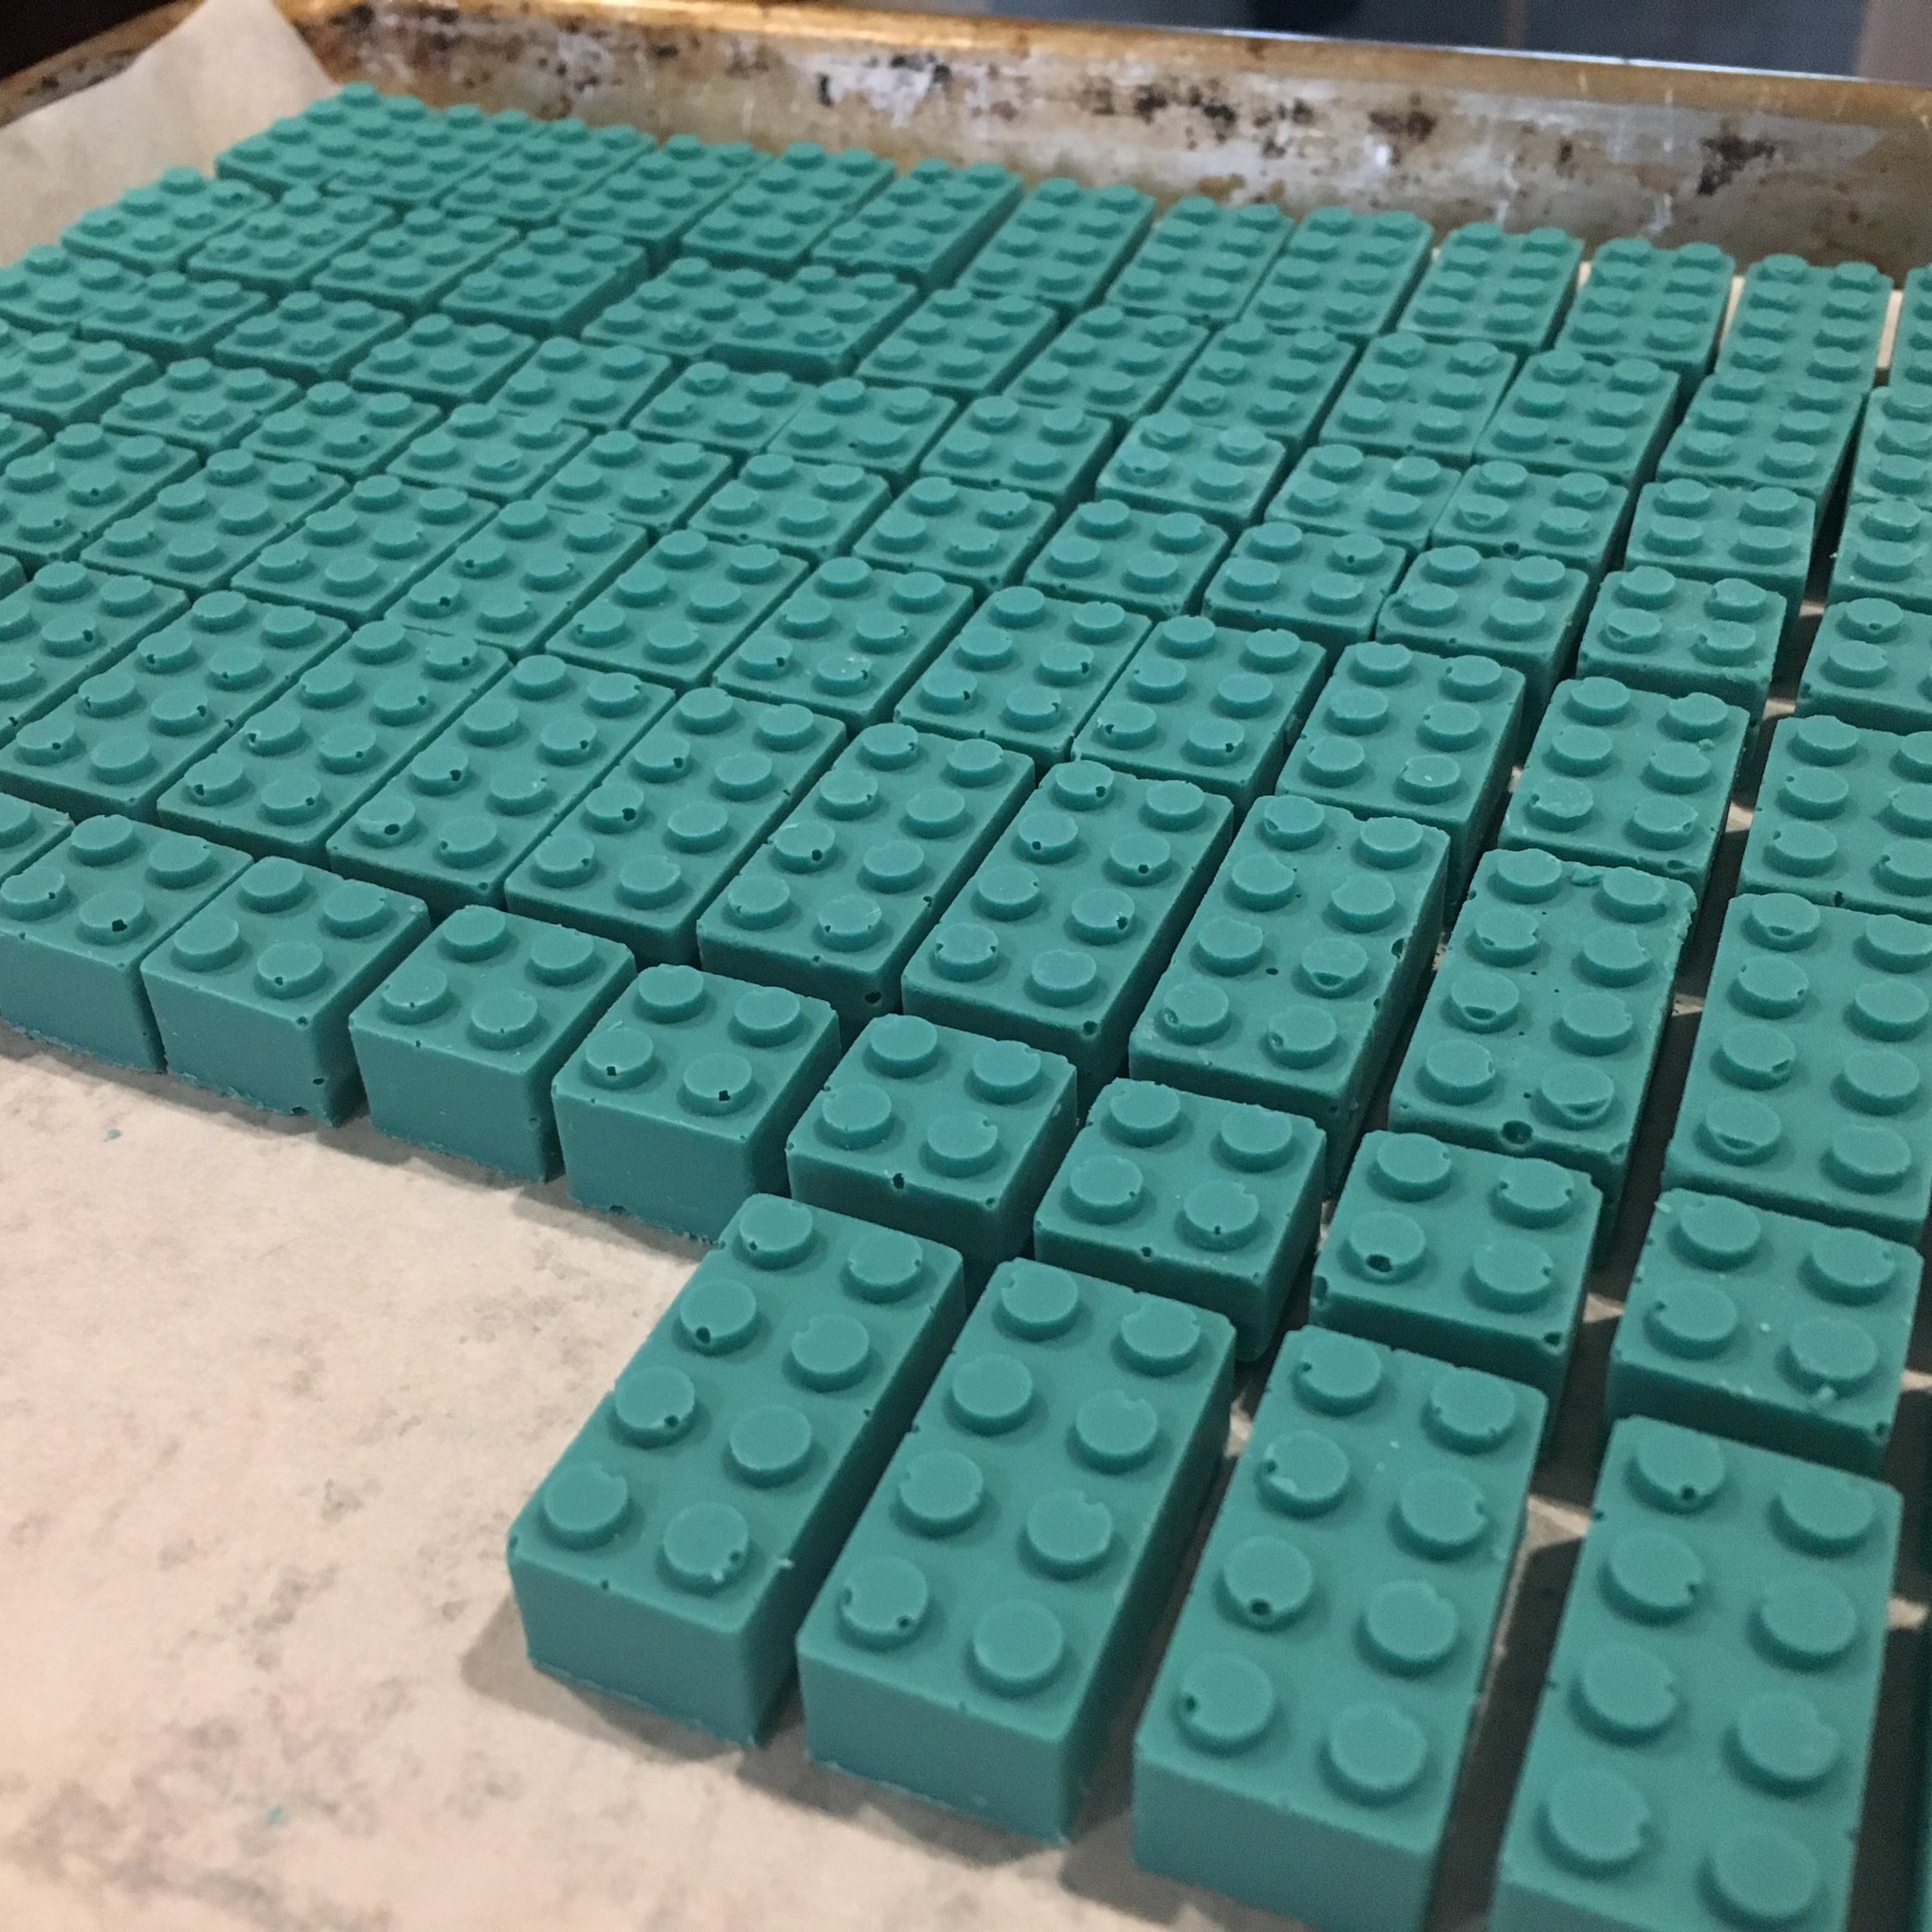
While most people are getting ready for Halloween during the last week of October, I'm usually planning and baking my daughter's birthday cake. This year she asked for a Lego Batgirl themed cake, so that's what she got. This cake sopped up about three and a half days of time, two of which were just making Legos (the final count was 646). There was a half day of trial and error with the Lego making because the sides and little pegs were initially coming out with big chipped edges that rendered then unusable. But I found a method that worked pretty well and yielded these stackable, edible guys. Sure, some of them still have tiny defects in the pegs or some slightly chipped corners, but overall, they are good enough for government work.

The method that worked the best was as follows:


- Melt your chocolate in a double boiler. I used Wilton Candy Melts that came pre-colored. You can also heat the chocolate up in the microwave, but I didn't want to constantly be pulling bowls in and out of the microwave (lazy) or end up scorching pockets of chocolate. By having it on the stove, I could keep an eye on it and stir it frequently.
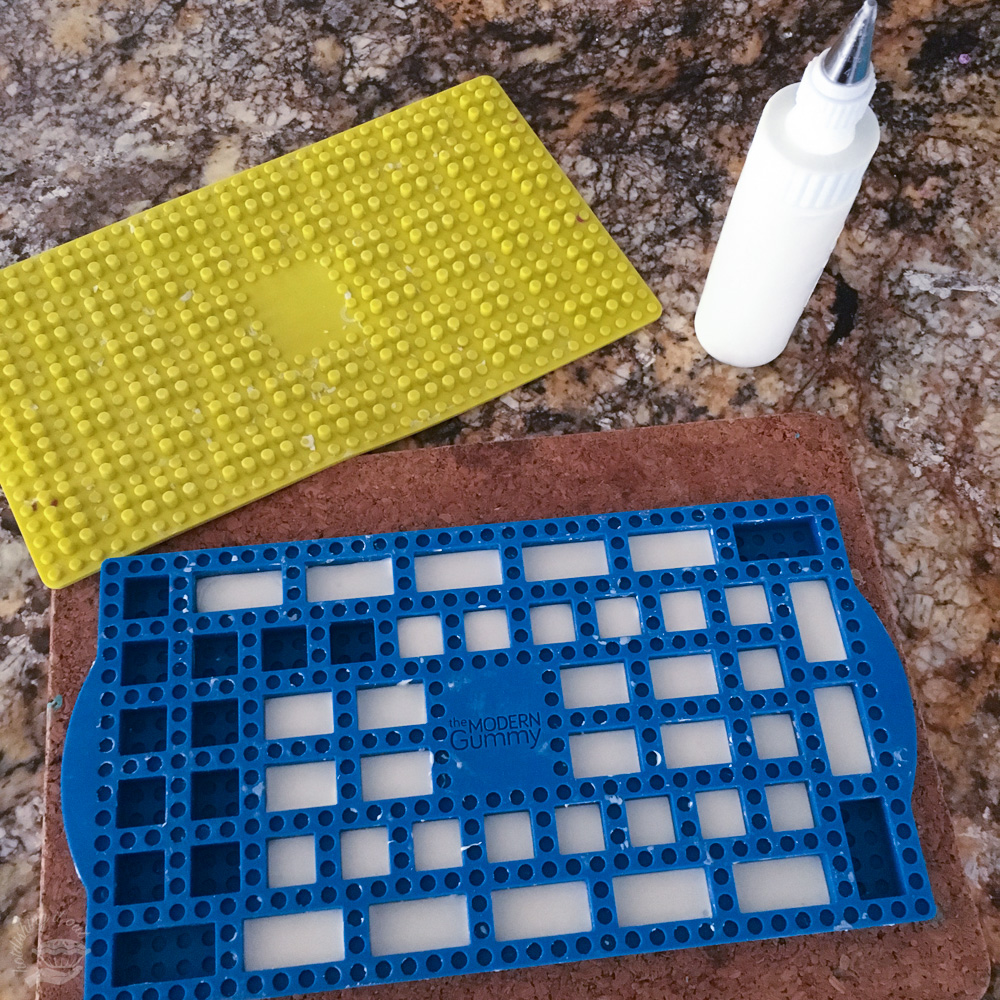
- Scoop the chocolate into a squeezy bottle fitted with a small piping tip. You can get these at your local craft store or here. You want to move kind of quickly once you get the chocolate into the bottle because once the chocolate starts cooling, it can clog the tip. The bottle I bought came with a size 2 tip, but I switched it out for a larger Wilton size 4 which worked just as well, and a bit faster.
- This is the mold I used for my Legos. It's made of two parts: a blue mold for the bricks and a yellow top that creates the depressions on the underside of the block so that the bricks can interlock (which is a bulk of the awesomeness). Pipe the chocolate into each little peg first. I know it sounds like a pain, but this actually goes pretty quickly after you get the hang of it. Then immediately pipe the brick mold about halfway full. I stopped after about every 5-10 bricks and banged the mold against the counter a few times to help push out air bubbles. This helps to avoid big missing chunks in your bricks.
- Then flood each brick mold flush to the top of the mat, banging it against the counter once in a while as before. Slowly ease the yellow pegged mat onto the mold. Make sure the logos in the middle of the mat are facing the same way because the mat is asymmetric and has a directionality to it.
- Cool the mold so the bricks set. I stuck mine in the refrigerator for 5 minutes, then moved them to the freezer for 10 minutes, then allowed them to warm up a little on the counter for 5-7 minutes before unmolding them. Meanwhile, I had my oven set to a low 110°F so I could stick my squeezy bottle in there between uses. This helped keep the chocolate inside the bottle from solidifying and clogging.
- Carefully remove the bricks from the mold. I had to run a quick knife around the base of each brick to trim the excess chocolate off.
- Repeat until you have enough Legos for your project or you lose your mind, whichever comes first.
The bricks can be stored in a safe place at room temperature. Make sure they don't get too warm because they melt pretty easily. You'll also learn pretty quickly how long you can handle them before they start melting from the heat of your hot little hands.
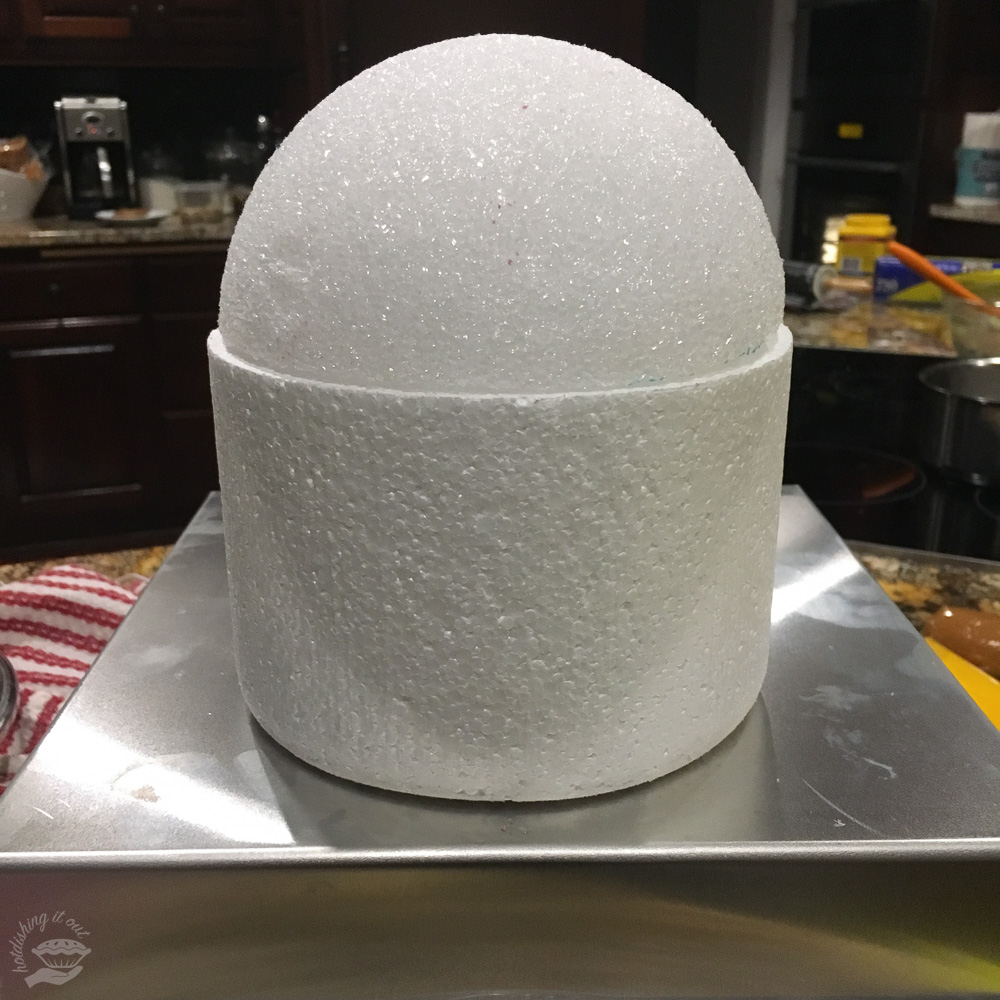
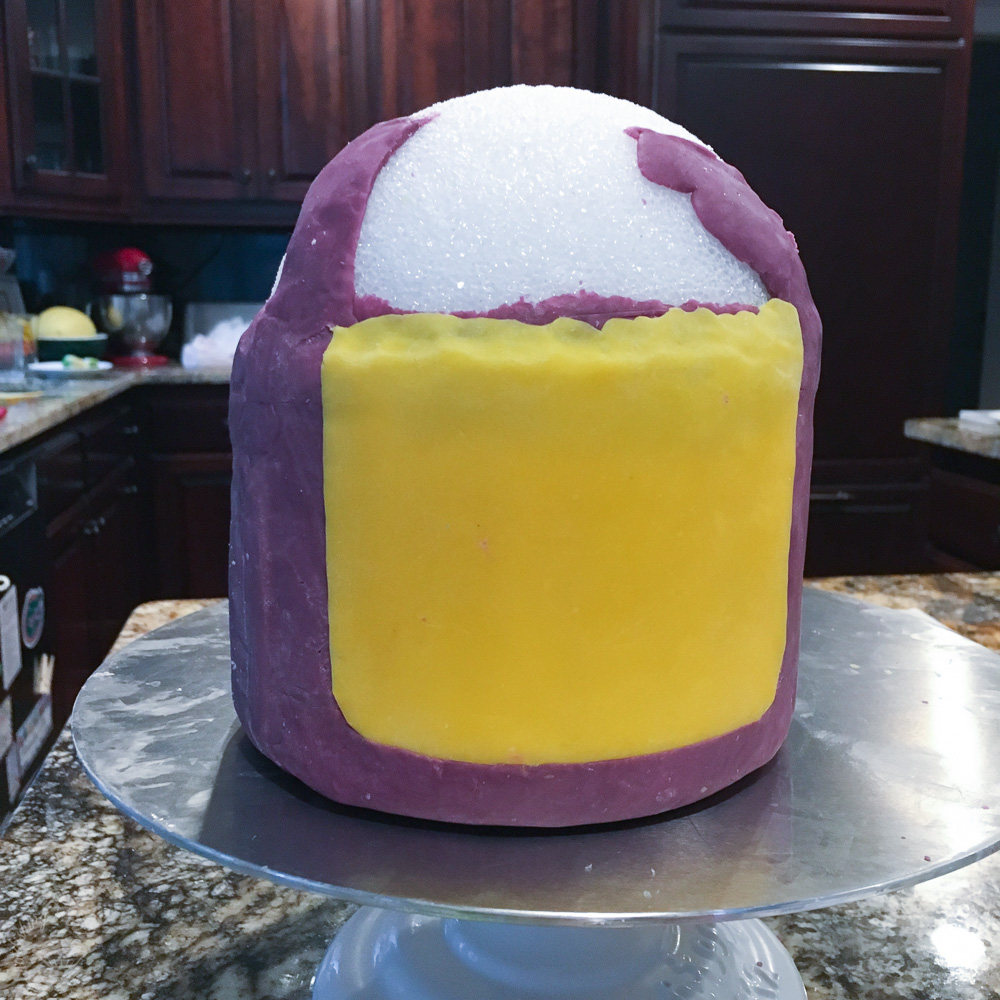
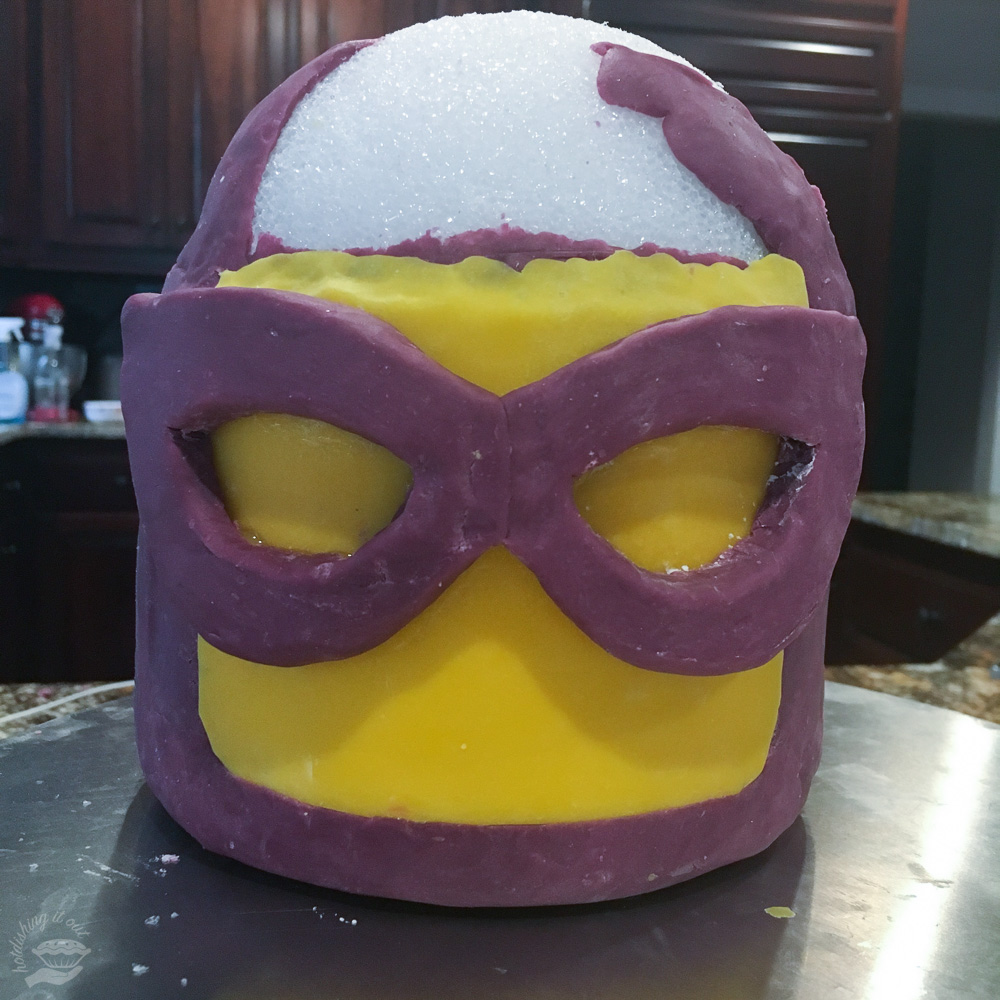
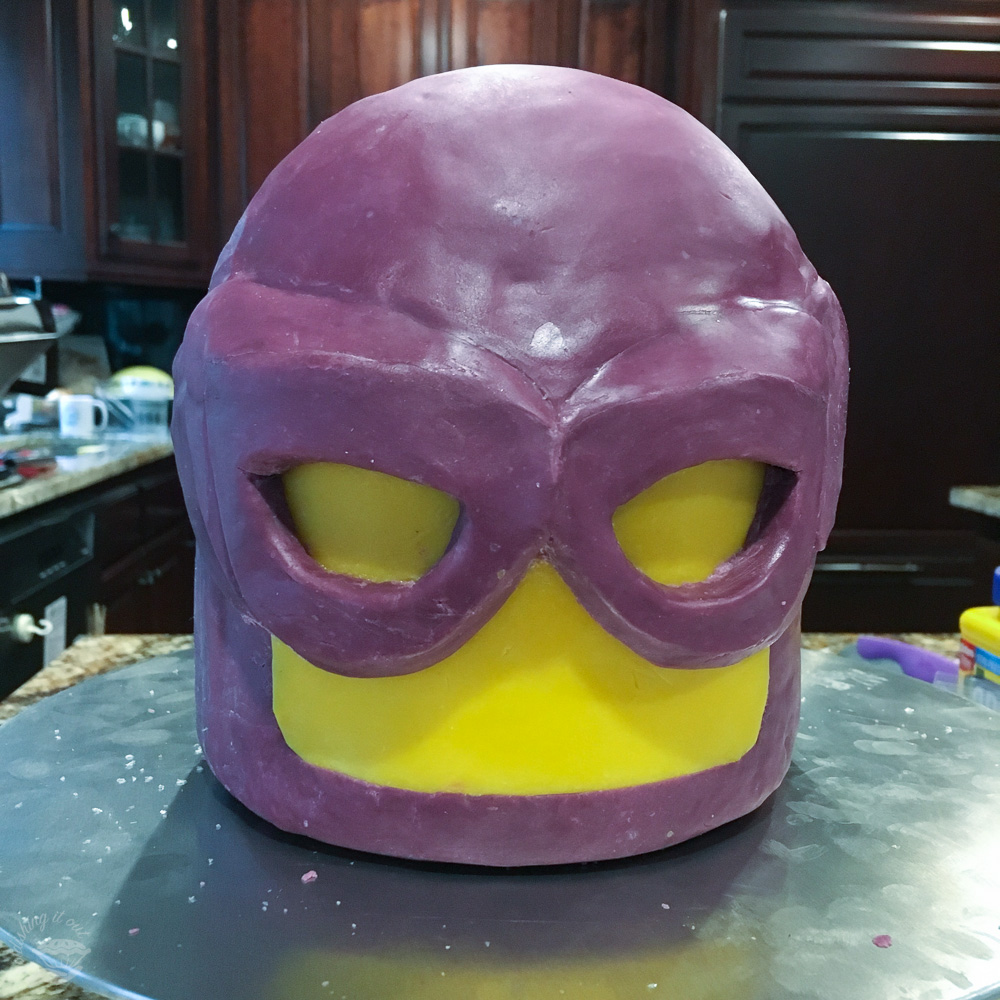
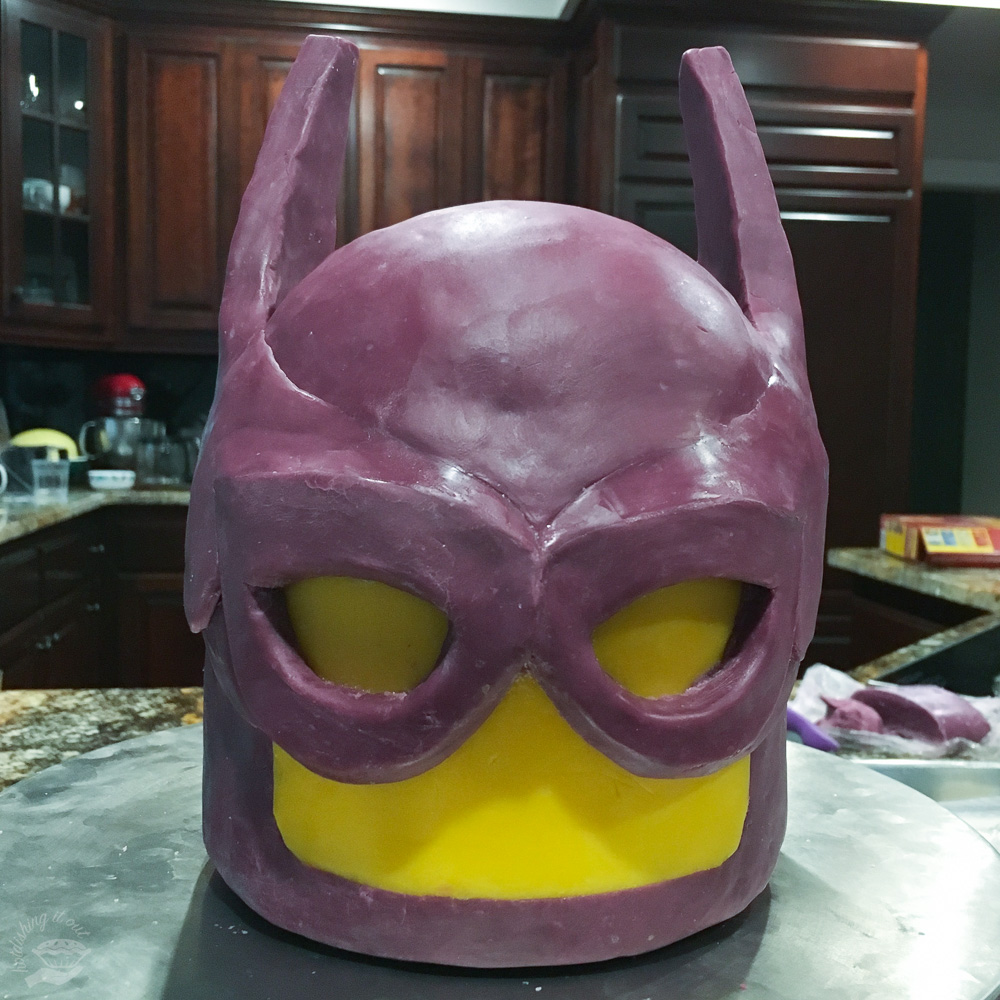
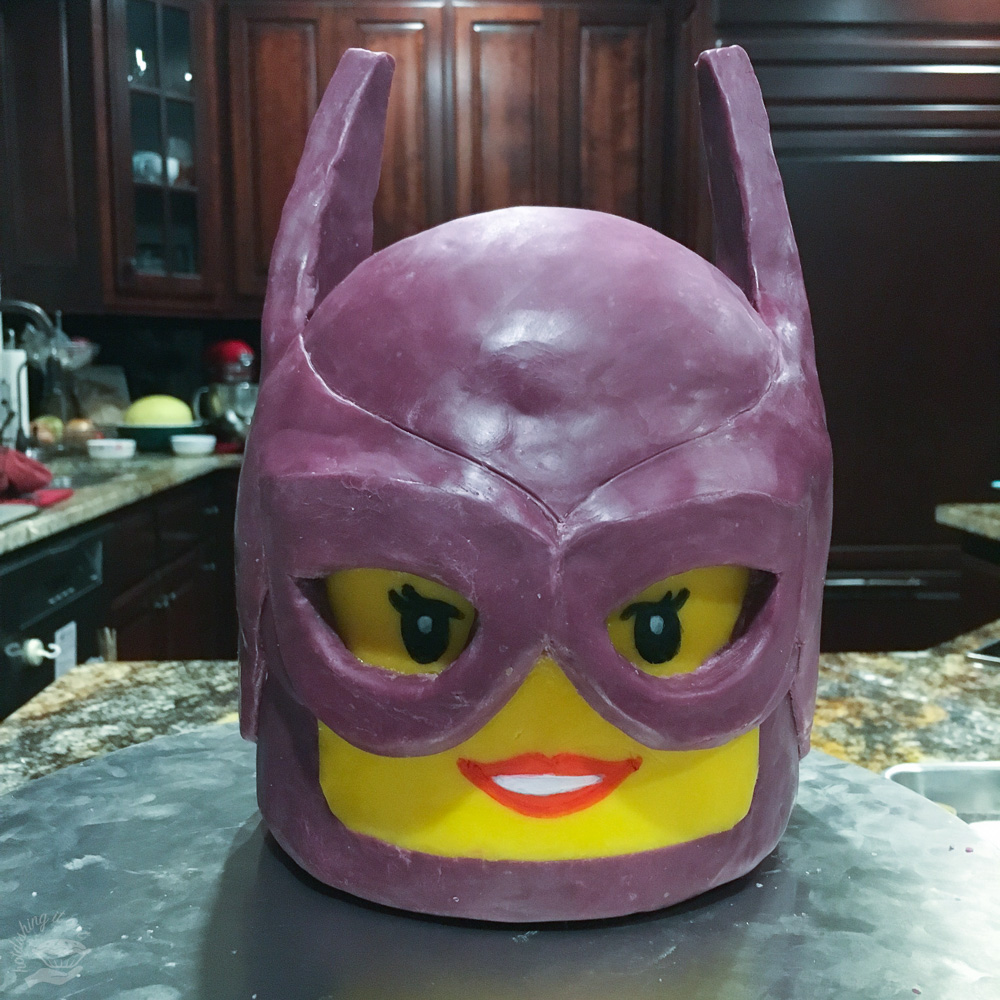
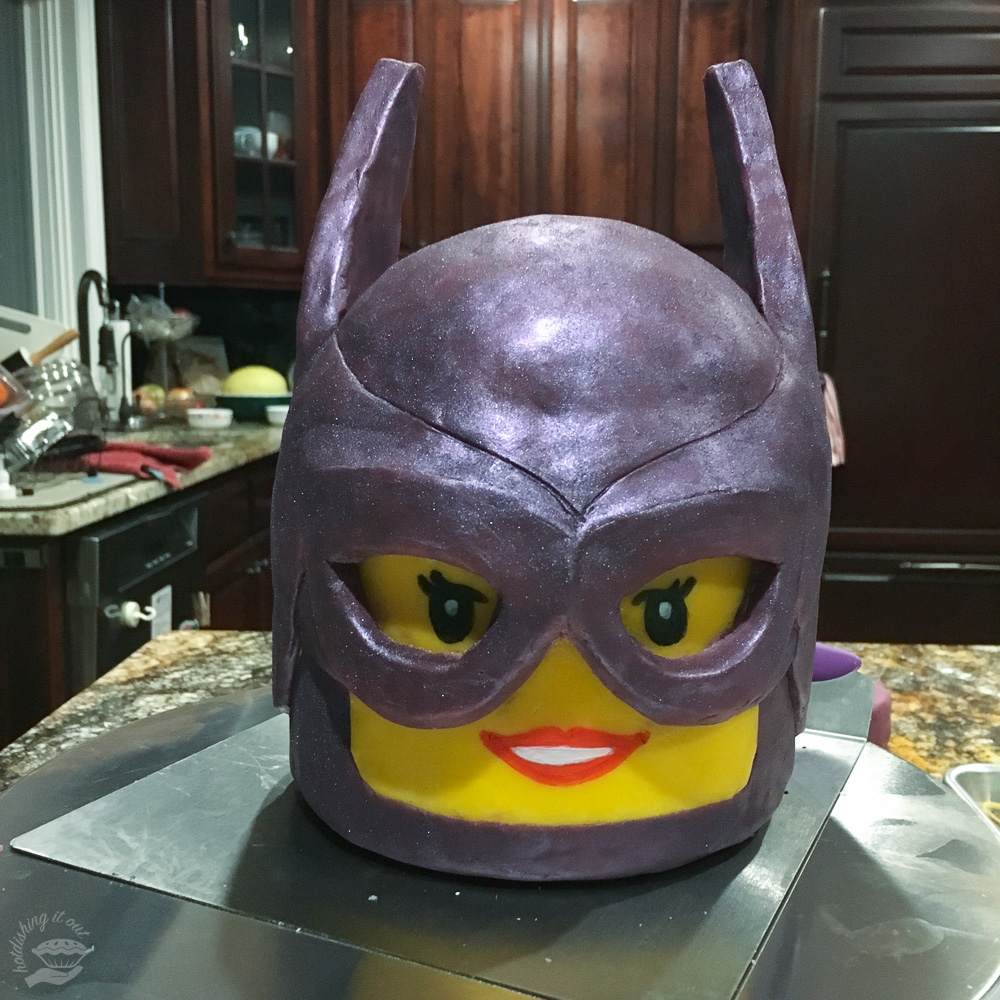
On to the Batgirl head. So, confession time: the head isn't truly edible. I didn't sculpt the head out of cake or rice krispie treats because I had to start making this well ahead of time, and frankly I didn't want to fuss with sticky rice krispies after making so many friggin' Legos. Even I have limits. So the base is styrofoam. I used a 6 inch cake dummy turned upside down, then cut an almost 6 inch diameter sphere in half and attached it with toothpicks. I covered the whole thing with modeling chocolate and basically just free hand sculpted it from pictures of Lego Batgirl. The ears are attached with bamboo skewers so they wouldn't flop over. I also used a heat gun (or a hairdryer would work) to help warm the chocolate up to make it more pliable and smooth out joints. Lastly, I dusted the whole thing with glittery luster dust. It was messy, but i think it helped give her a more finished look.
Not shown here is a smaller styrofoam disc that I also covered in purple modeling chocolate to serve as her neck. Things were rushed toward the end, so I wasn't taking as many pictures.


The requested cake was the usual chocolate cake the kids always request: chocolate (and eggless to accommodate her allergy). The cake itself was 10"x10" and about 4.5" tall once stacked and crumb coated. I added another smooth layer of vanilla frosting to the crumb coat and put dowels in the center to bear the weight of Batgirl's head. I tried to pre-build some of the Lego "walls" that went around the sides of the cake the night before, but they were hard to move as a single unit, so I ended up rebuilding most of them right on the side of the cake. After adding a single layer of Legos on top of the cake, I gently plopped on the head and voilà.
This was a challenging cake in that it took a lot of time, but it was kind of fun to make a cake that didn't really involve a lot of piped frosting. So now I can breathe easy for another 7 months until my son's birthday...
the 'gram